
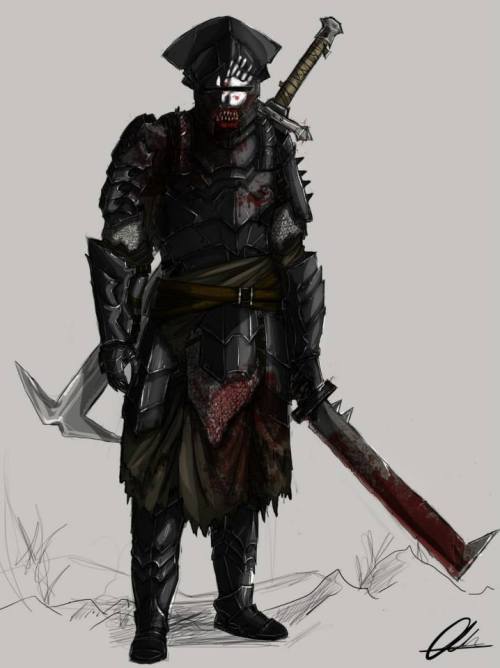
Making a custom designed costume was a ton of fun! Usually i spend so much time trying to make things look exactly like the source material, this was a great change. I definitely looked at a lot of different pictures and screen shots from both the movies and the game, Shadow of Mordor, as well as various fan art (see left). And in the end i took some ideas from each one and made it my own style!
Curtis picked this costume for him self when i was making my “Fem Azog” cosplay and he needing something to match. He always says he likes to “challenge” me with his builds, but I’m pretty sure thats just an excuse to pick the most difficult costume he can. haha
Materials Used:
-Worbla
-Insulation Foam
-Craft Foam
-Brown Canvas Fabric
-Brown Heavy Weight Fabric
-Brown Vinyl
-Leather Lacing
-Faux Fur
-Assorted Buckles, D-ring, Rivets and Studs
-Acrylic Paint
-BenNye Fake Blood
-Simple Pant Pattern
-Old Brown Shoes
-Kamui’s Armour Pattern Book for Men
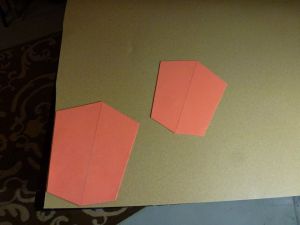
The first thing i did was cut out the pattern pieces from Kamui’s book to get started! I decided I would start with the bracers as they were my “test subjects” to figure out what sort of style I wanted to make the armour. First i cut out the pattern on some craft foam, and then did the same on Worbla. I then used the “sandwich method” to get the basic shapes.

|
|

|
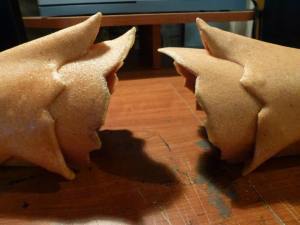
After sandwiching the foam and Worbla, i used an old bottle to get the curved shape i wanted, and tested it on Curtis arm to make sure everything fit.
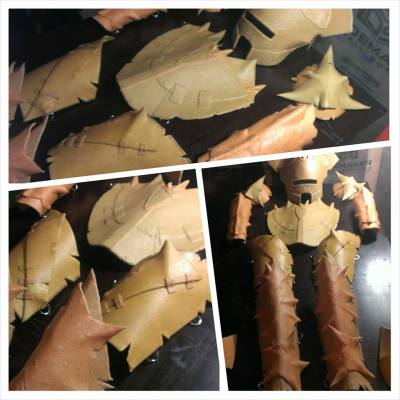
After I had the base all shaped I started to cut out random other shapes and attach them to the base. I really had no plan while doing this, i just wanted it to look sharp and mean, and kind of like they made it from what they had laying around.

|

|
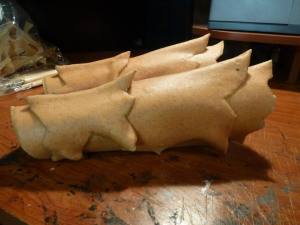
After adding another piece worbla to the front in a random spikey shape, i used an old pencil to shape the “spiekd” parts and get them to stand up and poke out properly. I then started to do the same thing with all the other pieces of armour. I would start with the base pattern shape from Kamui’s book, and add pieces to it.
|
|
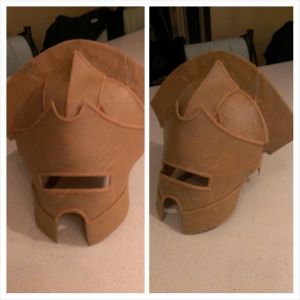
Next up was the helmet. These i find are always the hardest for me to make. I started the same way, using the books pattern for the base then added the additional pieces for the helmet. Curtis wanted this piece to be the style from the movie, so this on i actually had to follow a plan. It looked utterly ridiculous in the beginning stage, but as i added more to it, it started to come together. Lastly i added some thin strips of Worbla to the edges to give it a more “finished” feel.

|

|
|
Finally I had all the pieces done!

|
After attaching all the D-rings to the back of the armour that are used to attach the pieces to the body, it was time for paint!
How I paint all my silver armour is to prime, then start with a black layer of acrylic followed by dry brushing on some silver paint. After that i added some bronze and brown for “rust”.
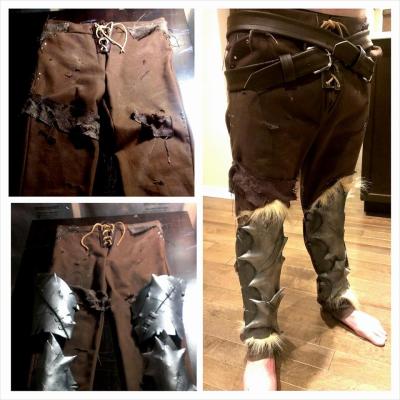
To make the pants, i simply used a basic pant pattern that came in one of the pattern i had purchased previously for a jacket, and then weathered them and added extra pieces of fabric. I also changed the front closure to something more “time period” like.
|
|
Once all the armour was painted and dried, it was time for the blood! I used the fake blood that BenNye puts out that actually dries and hardens. They have another variety that stays sticky, but that wouldnt work for long time use.
For the “shirt” i had a ton of fun. Again something i didnt plan at all, but i started with the main base for a shirt pattern and then started to add alternating strips of the fabrics i had. I used a heavy canvas, a heavy linen and then some of the vinyl i used for the belts as well. I decided to make it lace up the side, since i felt that added an interesting detail.
Lastly was gluing a little bit of fur to each of the armour pieces.

|

|
Lastly i made the weapons. I started by carving the main shape out of the pink insulation foam from Home Depot (sometimes its blue) and then sanded it down until i got the shape i needed. After that i covered it in worbla just like i did for the armour.

|
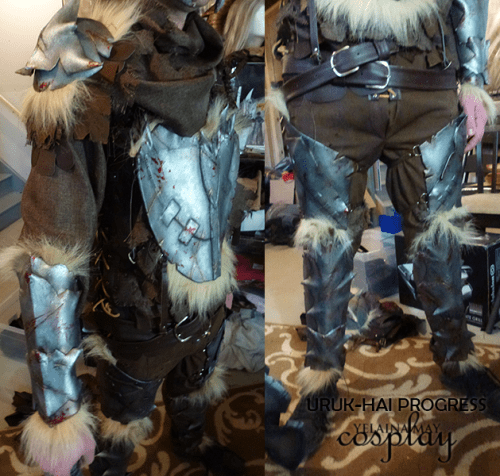
And then it was done!
|
I added a scarf and some extra belts so that it kept things a little more ragged, and not planned looking and Curtis added the White Hand of Saruman.
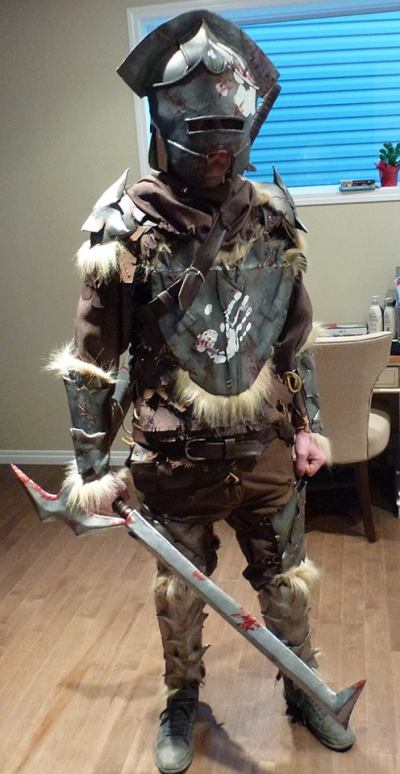
|

Thank you for the tutorial, it’s great to see how you handled the different parts and how awesome it turns out 🙂
LikeLike